

Chocolate Lace Basket
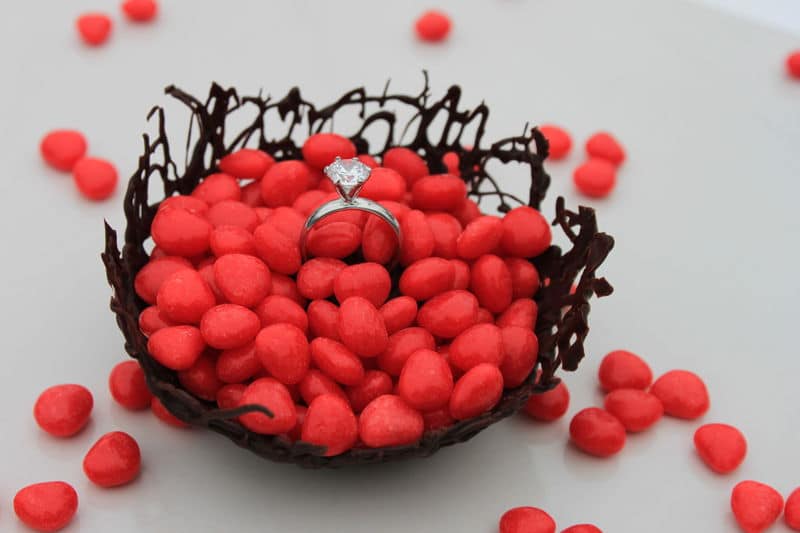
These lacy chocolate baskets are the perfect bowl when want to create a fancy looking dessert for your guests – it will even make a scoop of ice cream look beautiful!
Or if you want to give someone really special a treat (like an engagement ring!), forget the velvet box – anyone can give a ring that way. But a ring presented at the end of your meal, in this deliciously edible and delicate chocolate basket…you are sure to get an answer of “YES!!!!” to any question you ask.
Ingredients
- 6 oz semi-sweet or dark chocolate
- 2 Tbsp coconut oil or shortening
Supplies
- 4 Small bowls (in case you break your chocolate creations you’ll want some back-ups!). Choose small dessert type bowls, mini silicone baking molds, mini prep bowls, or you can even use the plastic containers that fruit cups are sold in.
- Tin foil
- Pastry bag with #4 tip, or Zip-Loc* bag
Let’s Get Started!
I tried forming these baskets a few ways:
- A mini silicone bundt pan mold – chilled in the freezer, set on a plate then drizzled with chocolate. Immediately place in fridge to set chocolate.
- Water-frozen filled bowl covered in foil – set on a plate then drizzled with chocolate. Immediately place in fridge to set chocolate.
- Water-frozen bowl covered in foil – hold in hand while drizzling with chocolate. Immediately place in fridge to set chocolate.
The last method I found made the best basket. I could better control where the chocolate went, since I could tilt and rotate the bowl, creating more controlled patterns. Use one of the bowls to practice on, then you’ll know how it feels to work with and how fast you’ll need to be to prevent dripping.
At least a day before you want to make the baskets, fill the bowls up with water and freeze until solid. This will provide a super-chilled surface so the chocolate will set almost upon contact. Keep the bowls in the freezer until ready to use. 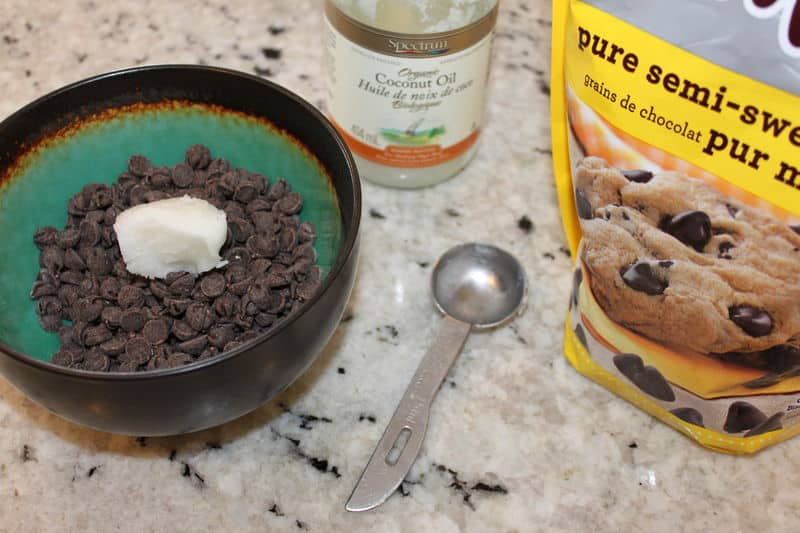
Melt the chocolate and coconut oil together, stirring until smooth. Pour into a pastry bag or a Zip-Loc bag. If using a Zip-Loc, make a small snip on the end – not too big and not too small. You don’t want it so small that the chocolate comes out in a fine stream that will be prone to breaking when you’re trying to remove it from the mold. As well, you don’t want the hole too big, so that too much comes out at once and won’t set quick enough, and will start to drip. Squirt a bit on the counter and see how thick the line of chocolate comes out, snip the tip a bit more if needed. 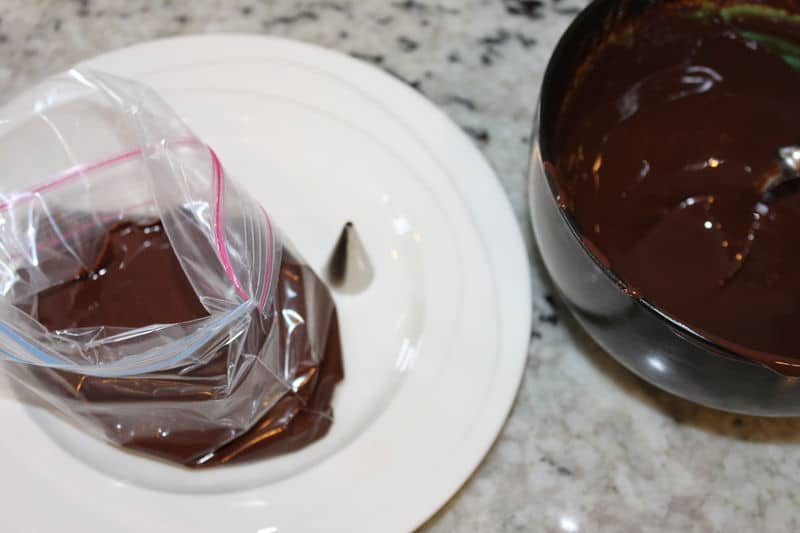
Get the frozen water filled bowls from the freezer and wrap the bottom of the bowl in foil. Smoothing out the surface to remove as many bumps or lines as you can. Don’t wrap the ends of the foil over the ice, cut the foil leaving about ½” trim turned out like a lip to catch drips – think of removing the chocolate from the foil, you want it to go as easily as possible. So the less you have to move the foil the less chance you’ll break the basket.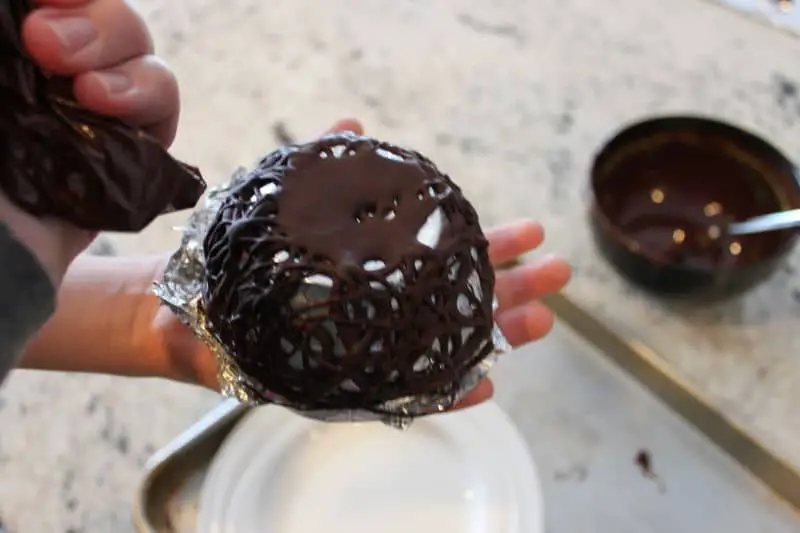
Drizzle all around the bowl, a bit thicker around the top edge (this will help when you’re removing the foil), and build up the bottom. For all of these methods you can repeat drizzling the chocolate and returning to fridge as you need to, to build up the layers to make the basket thicker. I went for a more delicate look, so all the pictures are the result from only one drizzling.
Once you’re done adding chocolate and the basket is fully hardened, retrieve it from the fridge and place the bowl right side up on a plate so you can unmold it.
If using a silicone mold, first gently pull from the top edges all around to release it, then slowly turn the mold inside out.


For the foil covered dishes, remove the dish/container and place the chocolate basket onto a small plate. Carefully fold the foil into the center around the top edge of the chocolate bowl. Then place one finger onto the bottom of the bowl and gently press, while using the other fingers to gently pull the foil away from the edges. Slowly work all the way around, always keep that other finger in the center, until all the foil is released.
Having your finger in the center works as a pivot point, so wherever you’re pulling from, the foil will stop pulling there. If you break any pieces, reheat the leftover chocolate and use it to make any repairs.


Handle With Care
Unless you take the time to temper the chocolate, as soon as you touch the basket with your fingers it will almost immediately start to melt (tempering affects the molecular structure of the chocolate, giving it a higher melting point). So when you need to move the basket, use an offset spatula or cover you hands with a few layers of paper towel.
Another important thing that tempering chocolate does is prevents the chocolate from ‘blooming’, or forming a whitish film all over its surface (it’s completely harmless, the white substance is the cocoa butter that has come out of emulsion). Tempering chocolate is very hard to do correctly without a proper tempering machine, so to prevent the bloom just keep the chocolate basket in the fridge until you need it. Depending on your room temperature, it can sit out for about half the day before it may start to bloom.
Now fill your beautiful lacy chocolate basket with whatever you like…candies, ice cream, or even a ring!
*TIP: if using a Zip-Loc bag for the melted chocolate, once you’re done with it pop it in the fridge. Once the chocolate is set, rip open the bag and turn it inside out. Every bit of the chocolate will easily come out – no need to waste a single bit of delicious chocolate! Store in another bag to use for another time.


Thank you for sharing this wonderful recipe and personal way to doing the basket. Merry Christmas to you and the family!
These kinds of fun recipes are my favorite to make – so simple, yet so beautiful! Happy Holidays to you and yours, have a great day!